
A common problem in computer mice is that after a period of using them, they randomly start double clicking when you single click. This random double clicking often occurs after several years of using the mouse and can be very annoying. Usually it is the left mouse button that develops this issue.
All major brands of mice seem to have this problem. No matter if you have a Logitech, Razor, Corsair or Microsoft mouse, at some point you are likely to have to deal with this issue. Similarly, it also does not matter whether it is a high-end gaming mice to trackball mice.
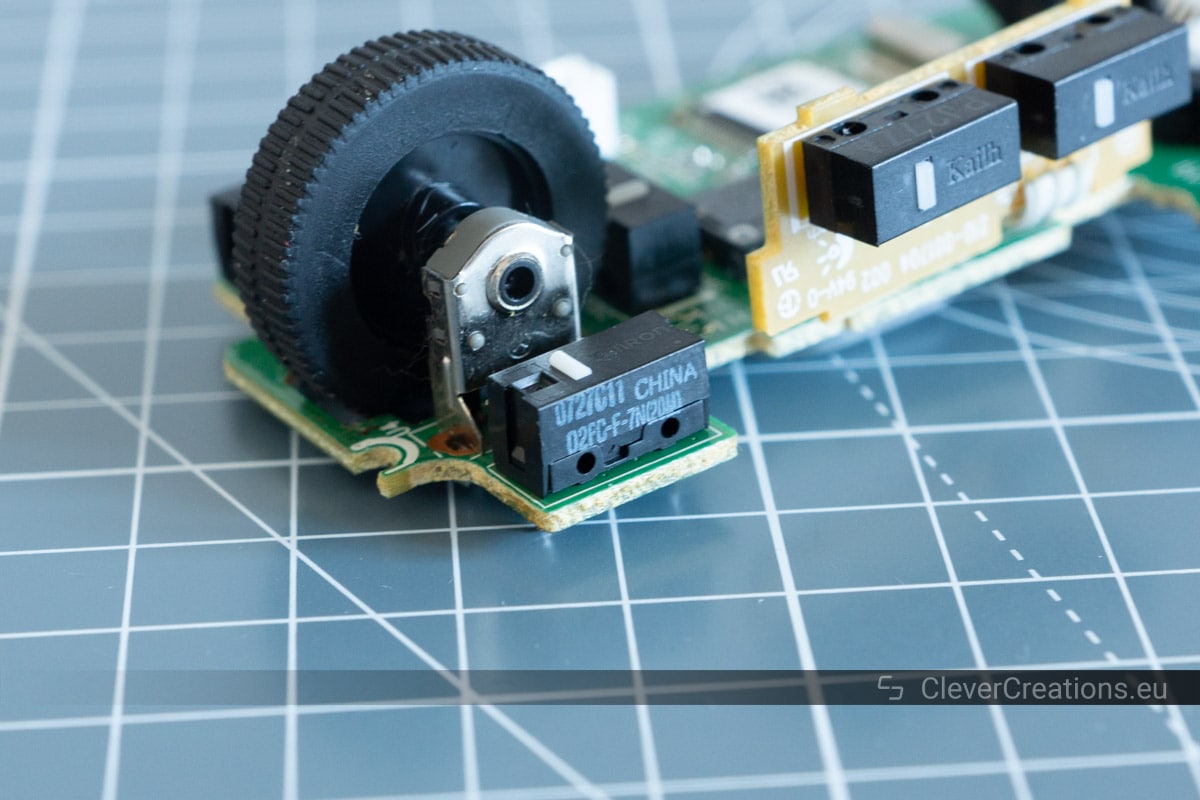
The random double clicking is usually a hardware problem. It is caused by the microswitch inside the mouse wearing out. Because usually the left mouse button is used the most frequent, this is the button that fails first.
In this article I will explain you how to fix a mouse that has the double clicking problem, explain what causes the issue, and show you step-by-step guides for two different methods for repairing the microswitch inside the mouse.
Before showing you the best ways to repair the mouse button, I will first answer some frequently asked questions:
Why Do Mice Develop the Double Clicking Problem?
A randomly double clicking mouse is nearly always caused by a faulty microswitch. The microswitch has a mechanism with a metal spring inside of it that helps register a click when you press the mouse button. The metal spring wears out over time. When this happens, the clicking becomes unreliable, and the mouse starts to double click when you single click.
Usually the random double clicking occurs infrequently, after a couple years of using the mouse. But within days or weeks after the switch starting to fail, the mouse can begin to double click all the time. Sometimes the button stops working completely after that.
How Can You Tell if the Problem is Caused by a Faulty Microswitch?
While a random double clicking mouse is nearly always caused by a malfunctioning microswitch, it is important to first exclude any software causes. This means making sure that you have the most recent drivers for the mouse installed, checking the Windows mouse settings, and checking the mouse on a different PC if possible.
If none of the above makes a difference, it is likely that the microswitch of the button is causing the issue. This is often the case, especially if you did not make any software changes to the PC recently and if the mouse is already a couple years old.
How Can You Repair a Double Clicking Mouse Button?
In this article I will show two ways to fix a double clicking mouse button. The first method is to open up the microswitch and slightly bend the metal spring mechanism. The second method is to remove the entire microswitch and to solder a new one onto the circuit board.
The first method is easier, as it does not involve soldering and it can be done with relatively little tools. Unfortunately, this method of fixing the microswitch is not 100% successful, and when it is, it does not always last very long. Therefore this method might has to be repeated at some point.
The second method, replacing the microswitch, is a bit harder. However, it does have the advantage of being guaranteed to work, and it lasts a lot longer. Using this method will give you peace of mind of being able to use the mouse without worries for a long period of time.
What Do You Need to Fix the Mouse Button?
To fix the double click problems of your mouse you will need a couple of tools, which are listed further down the page. If you choose to replace the microswitch, you will also need a replacement for it. Replacement microswitches are readily available online and do not cost very much.
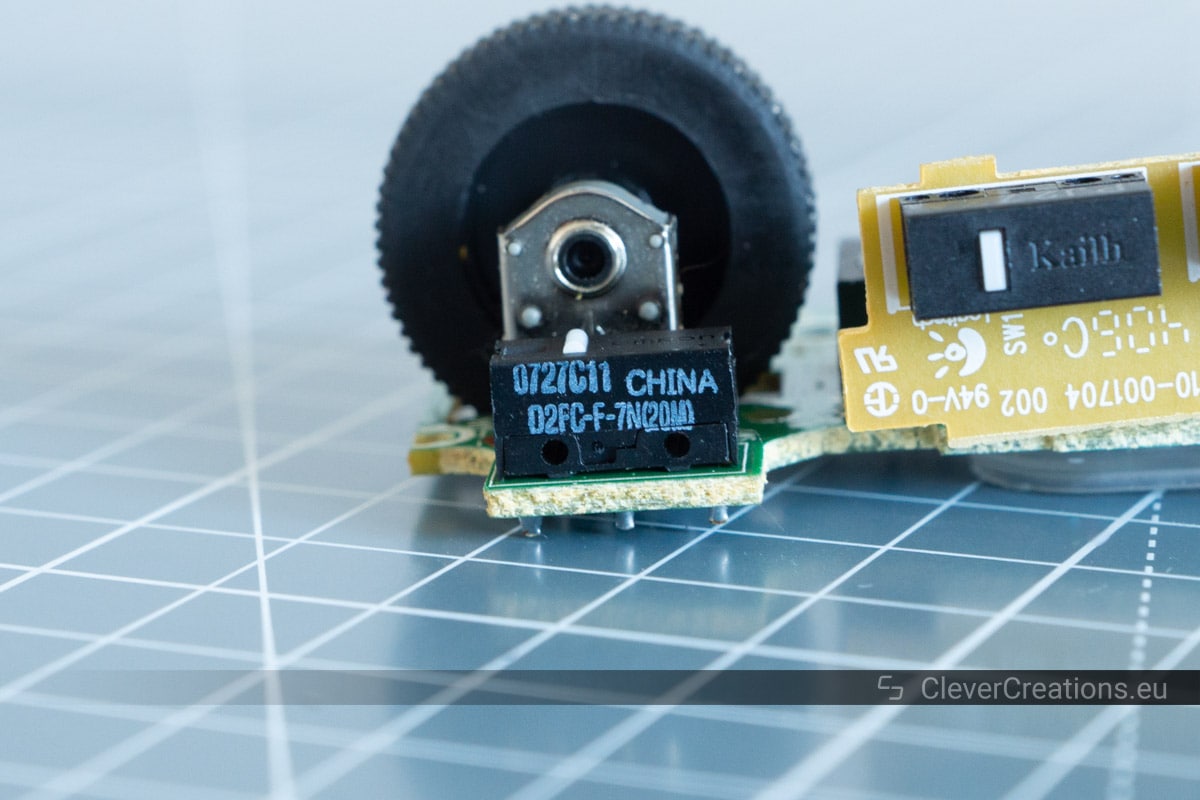
The most commonly used microswitch for mice is the Omron D2FC-F-7N. Before ordering a replacement switch however, please make sure that you know for sure which type of microswitches your mouse uses.
You can do this by checking online (Google the mouse name/type + “microswitch”), or by opening up your mouse and checking the type number of the switch.
Is a Double Clicking Mouse Button Worth Fixing?
Definitely, it is always a waste to discard an entire device because of something small like a faulty microswitch. Just like when repairing a Nexus 5 power button, fixing the button yourself at home is not difficult and will save you money on a new device.
Do the Guides Below Also Work for Repairing Non-Logitech Mice?
The repair guides further down the page use a Logitech G Pro mouse and a Logitech M570 trackball as examples. If want to fix a different mouse or trackball, you can still use these guides. The opening of your mouse might be a but different (screws in other places, etc.), but the overall process will be the same.
How to Repair an Existing Mouse Microswitch
The following instructions are for repairing an existing microswitch without replacing it. For a guide to replacing the microswitch, go here.
What You’ll Need
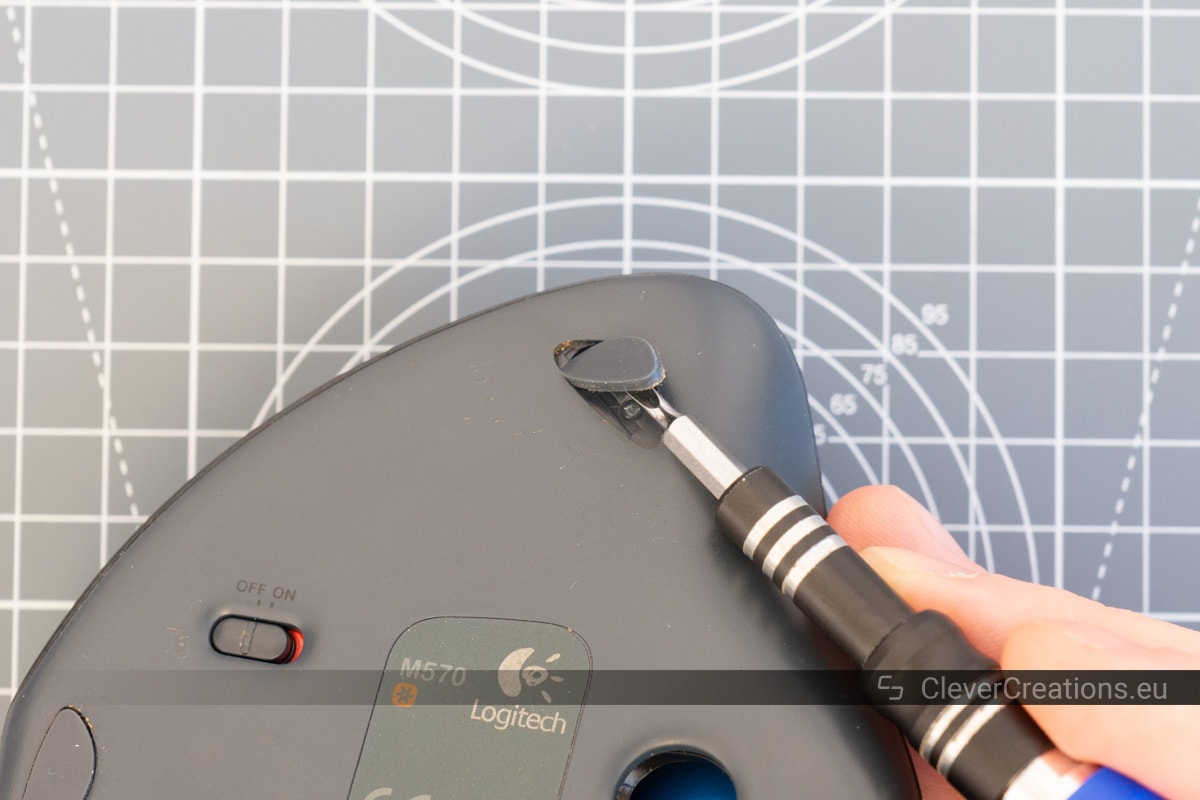
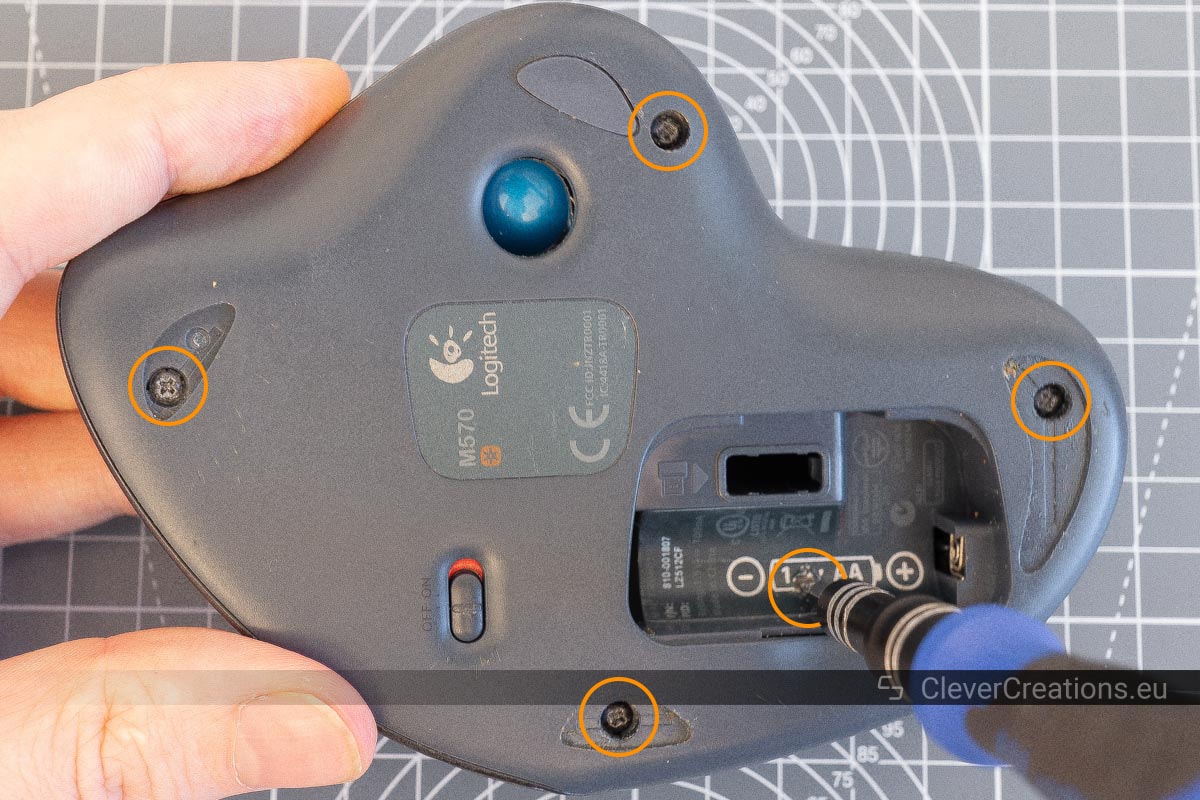
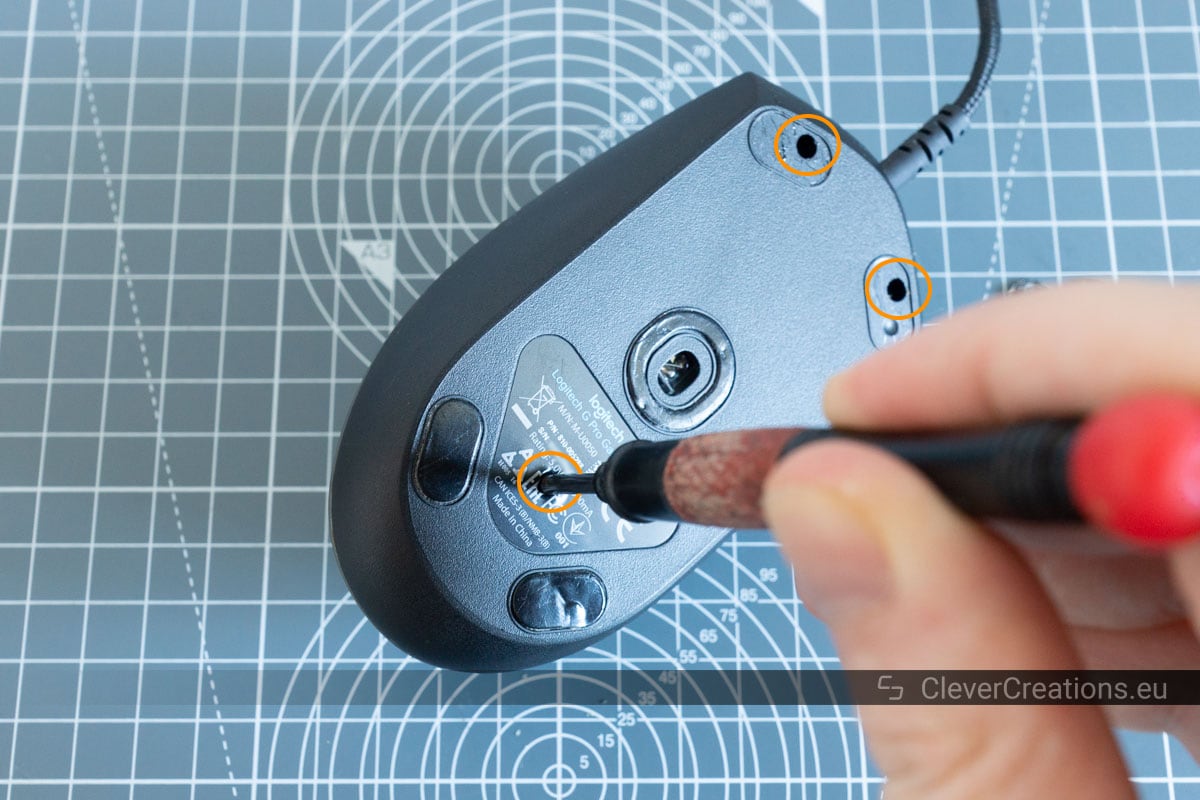
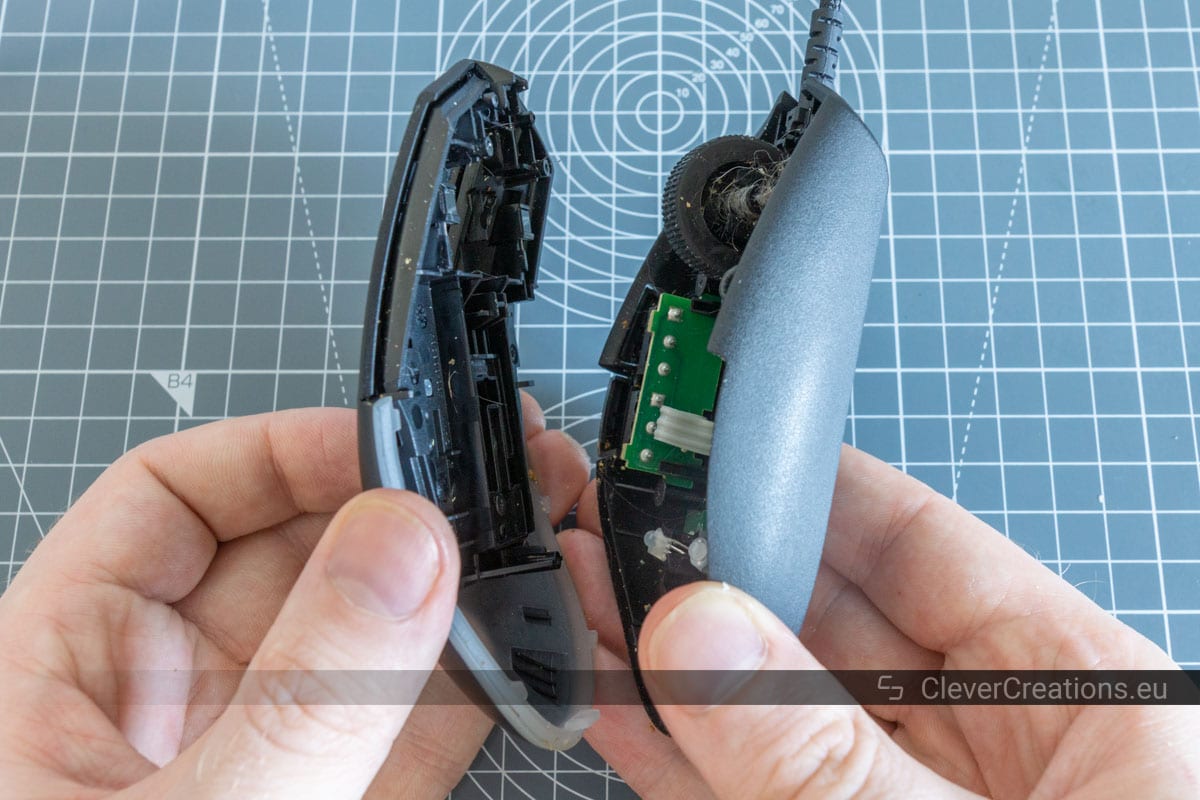
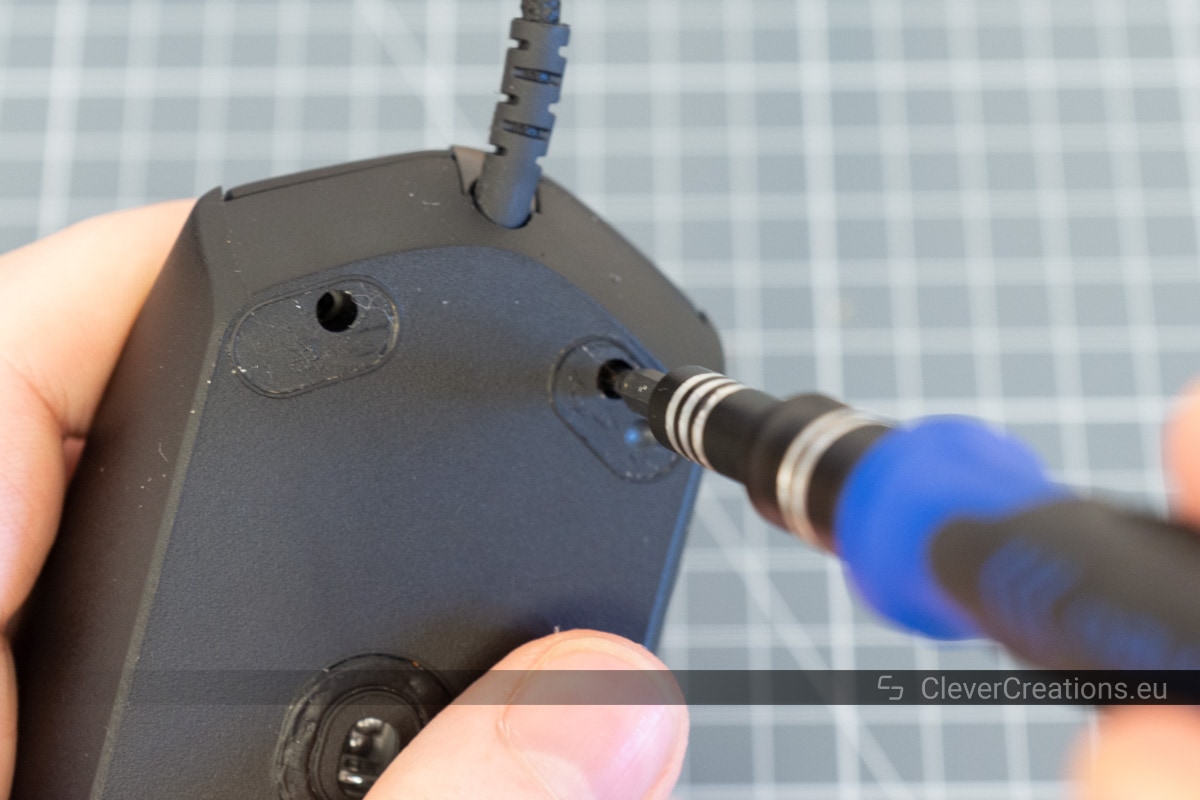
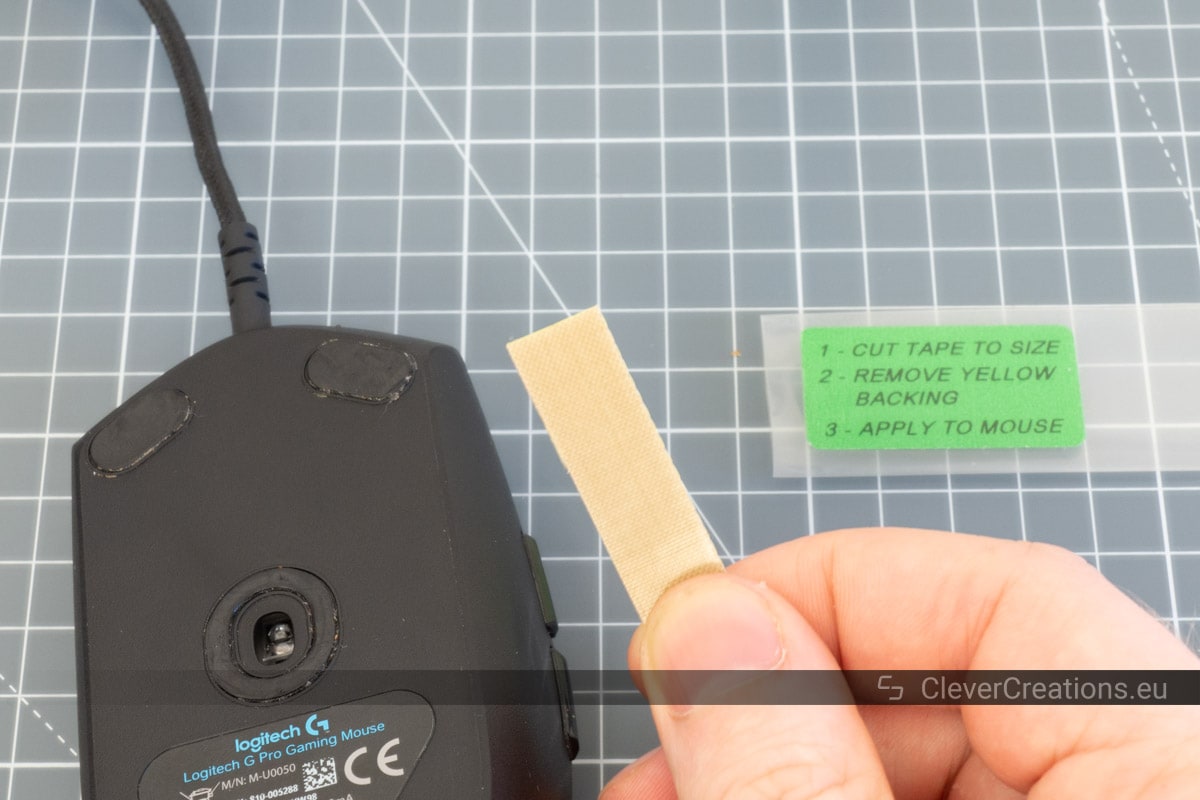
Opening the Mouse

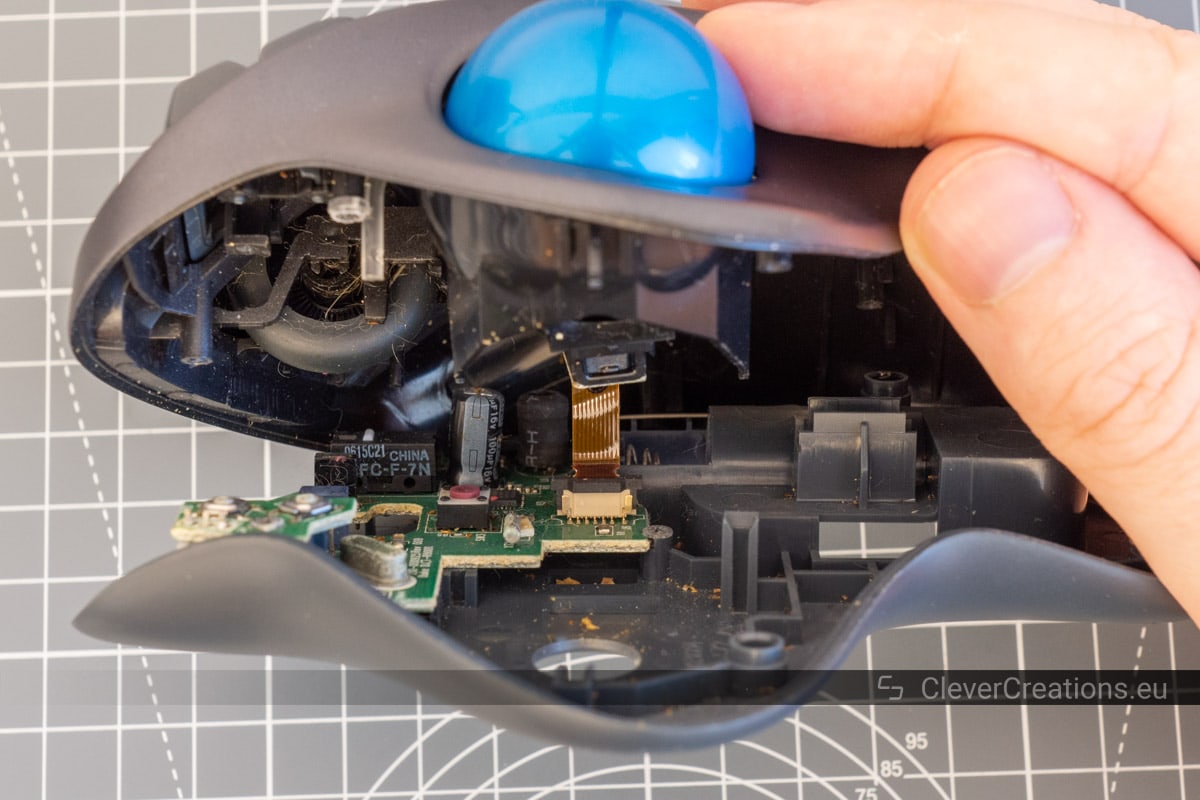
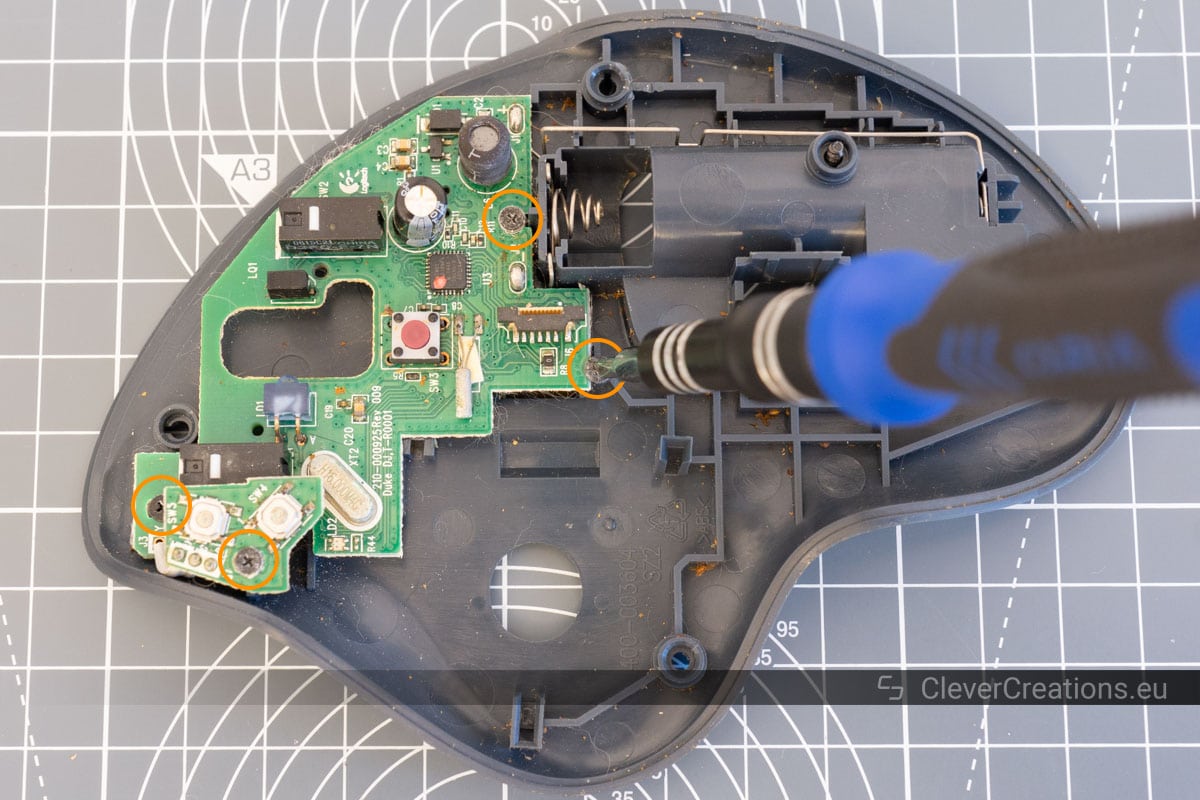
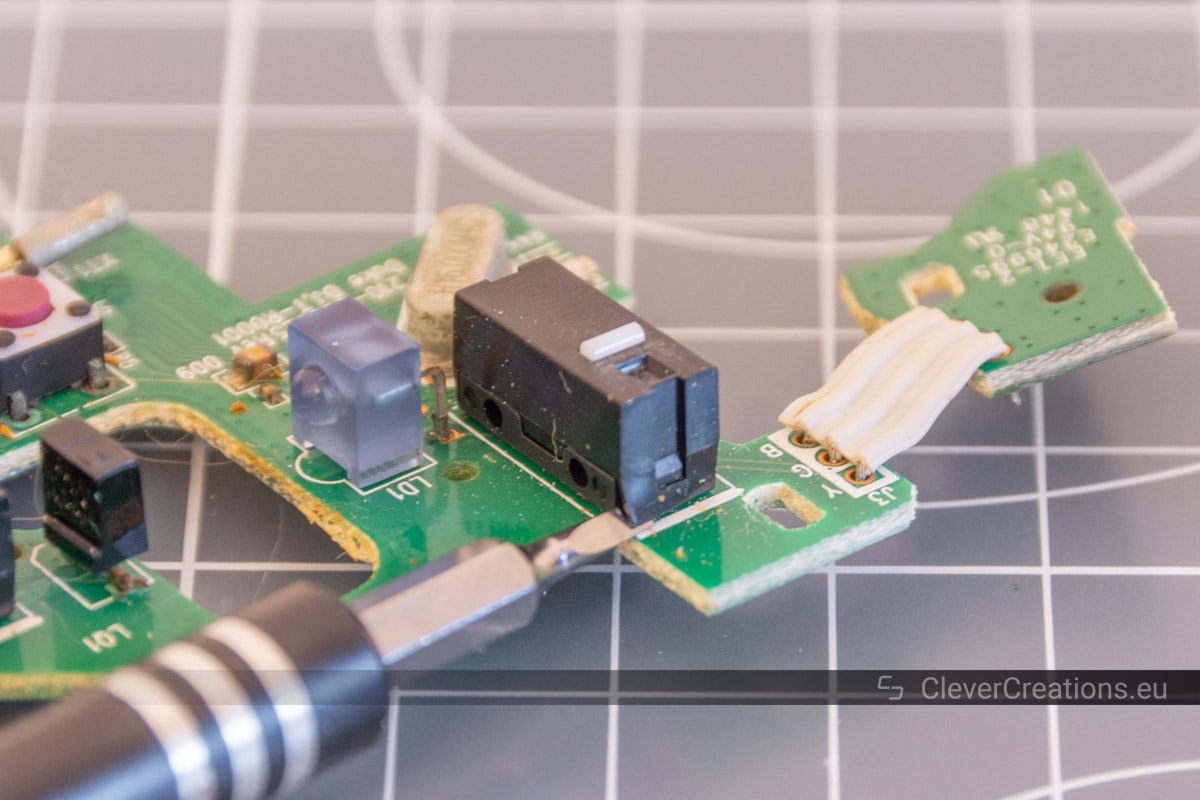
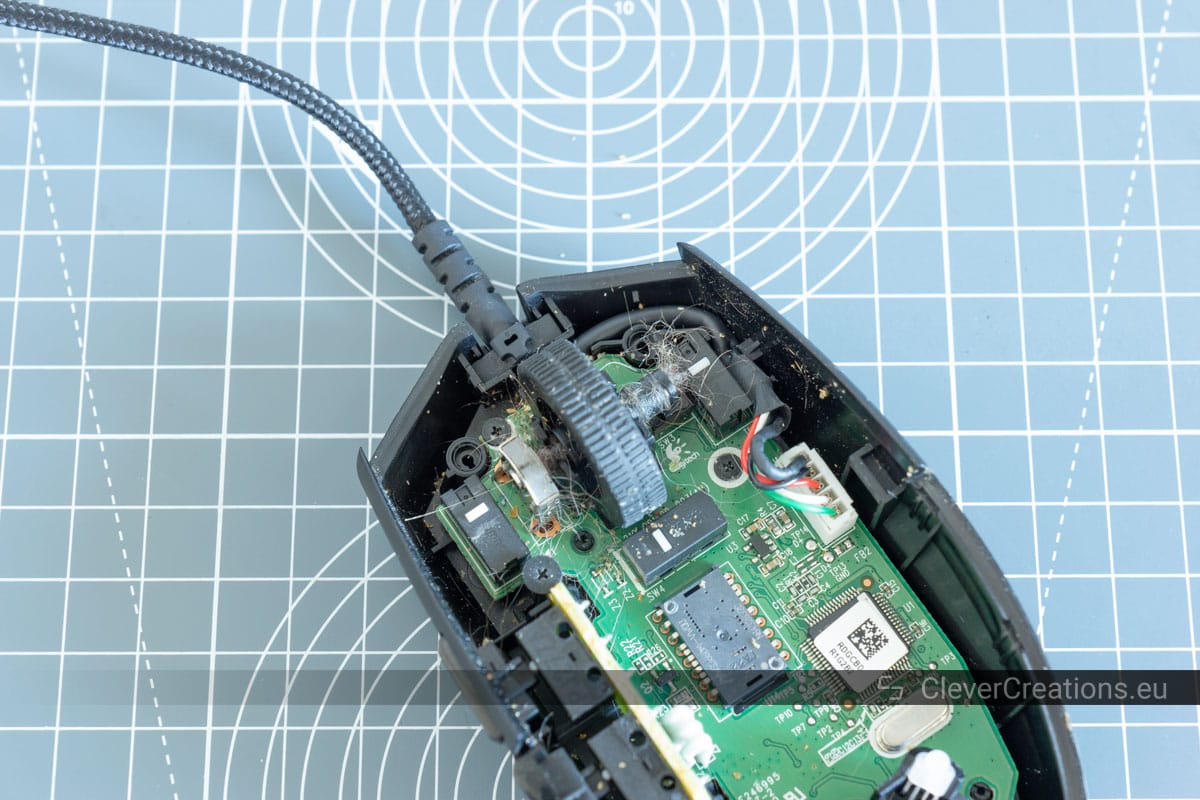
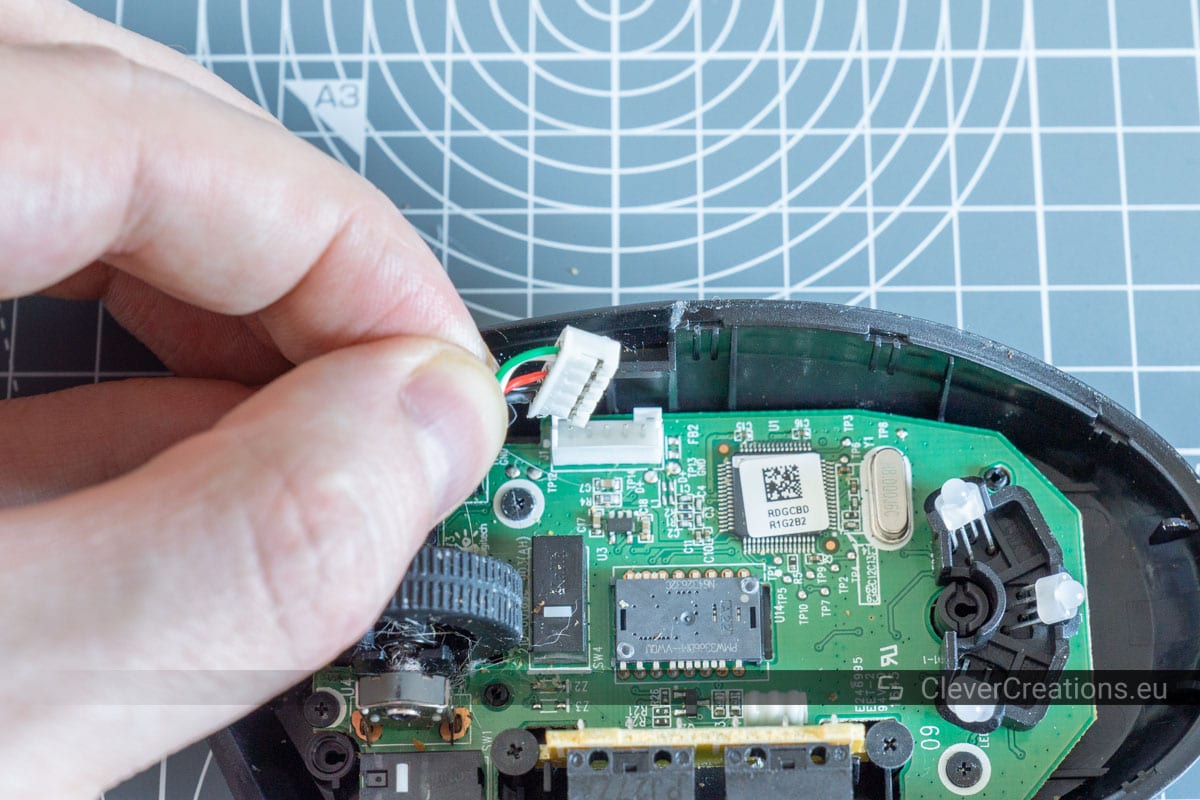
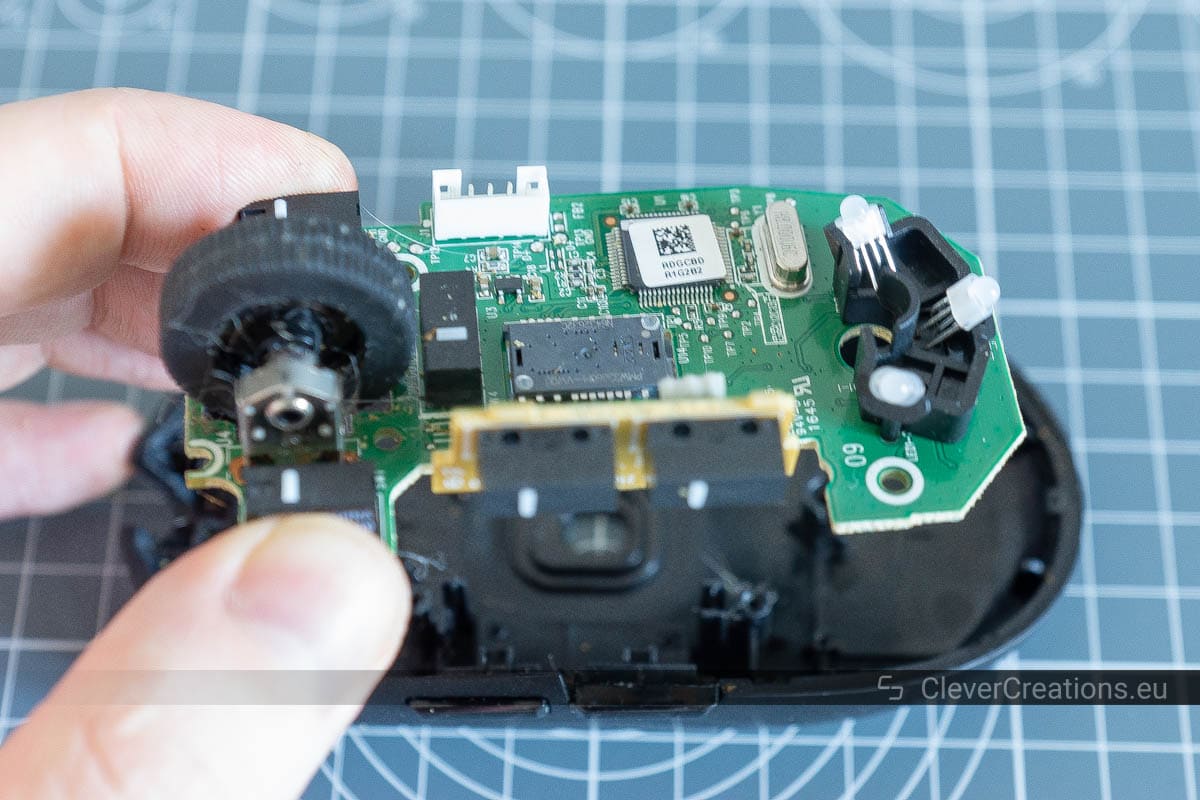
Removing the Circuit Board
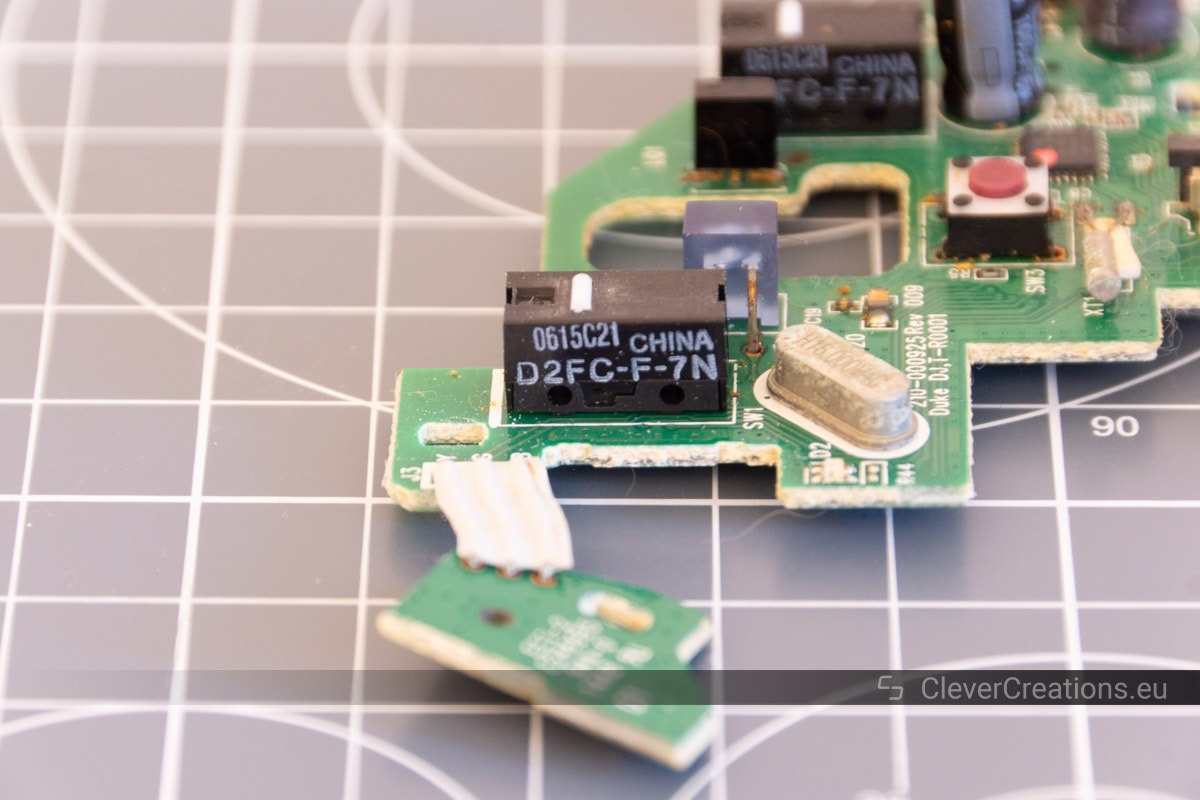
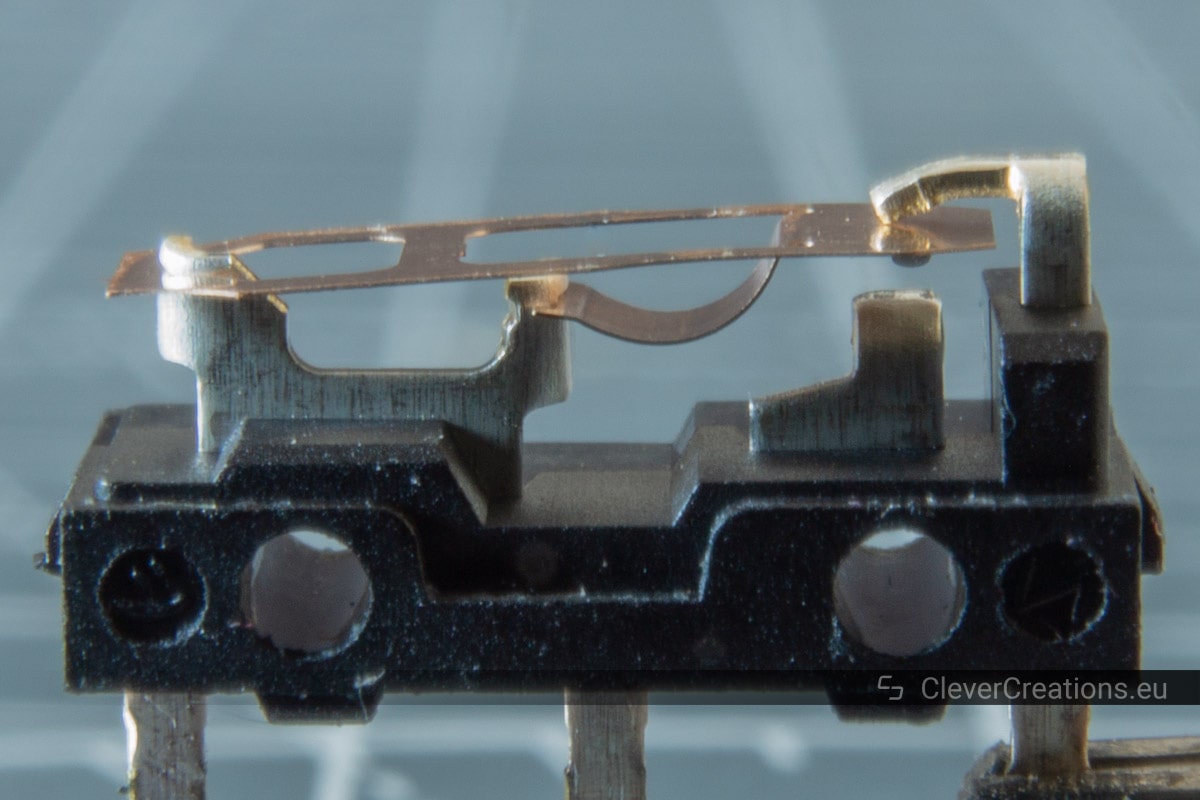
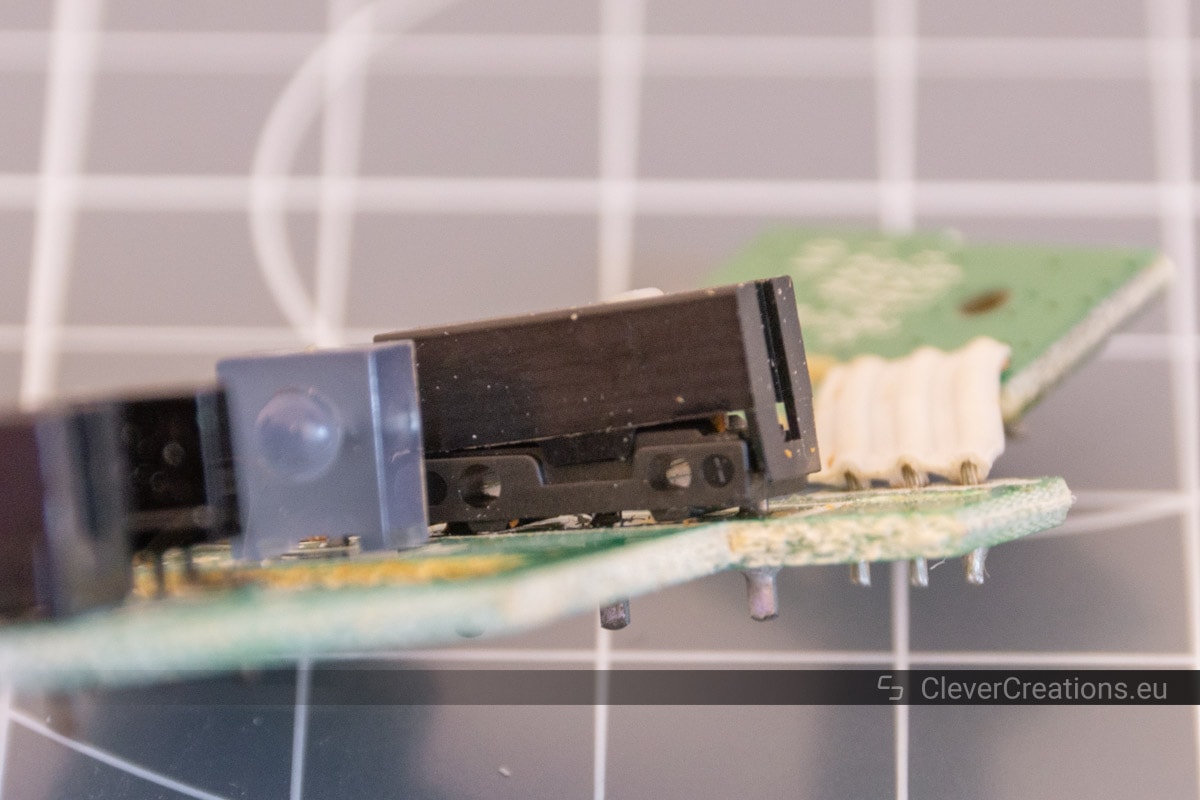
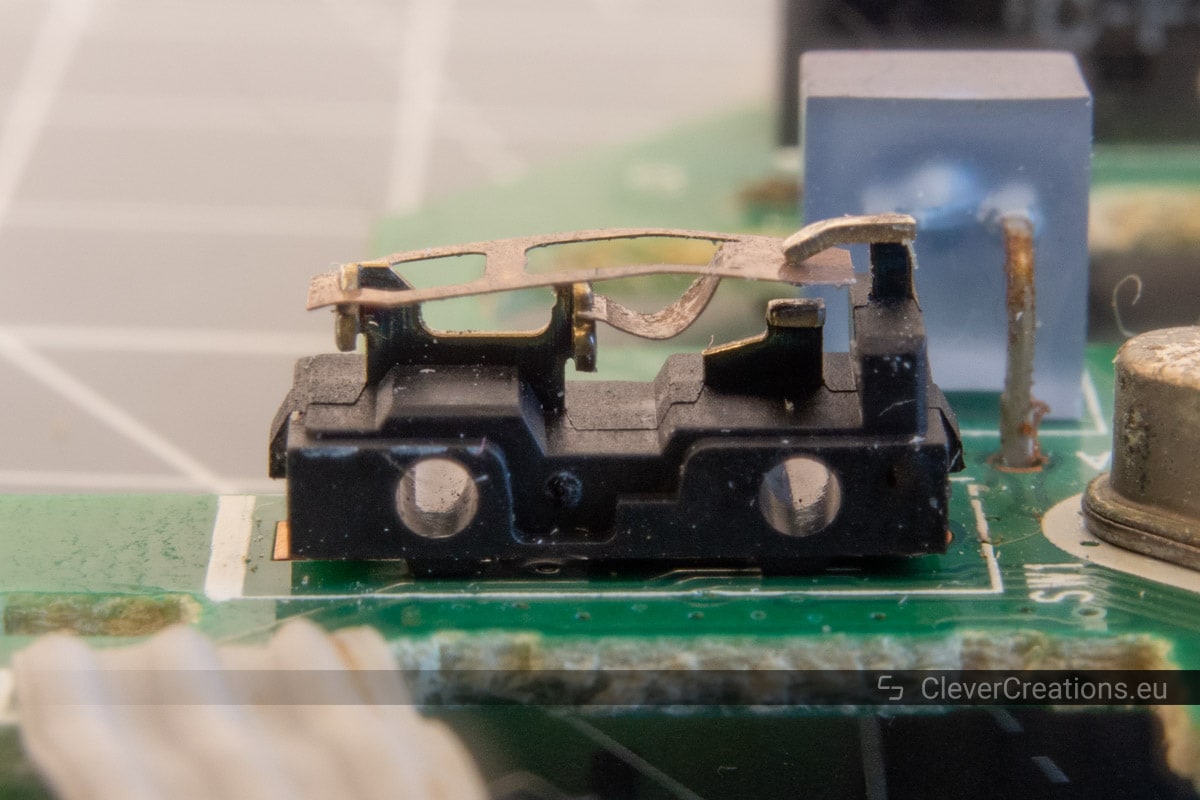
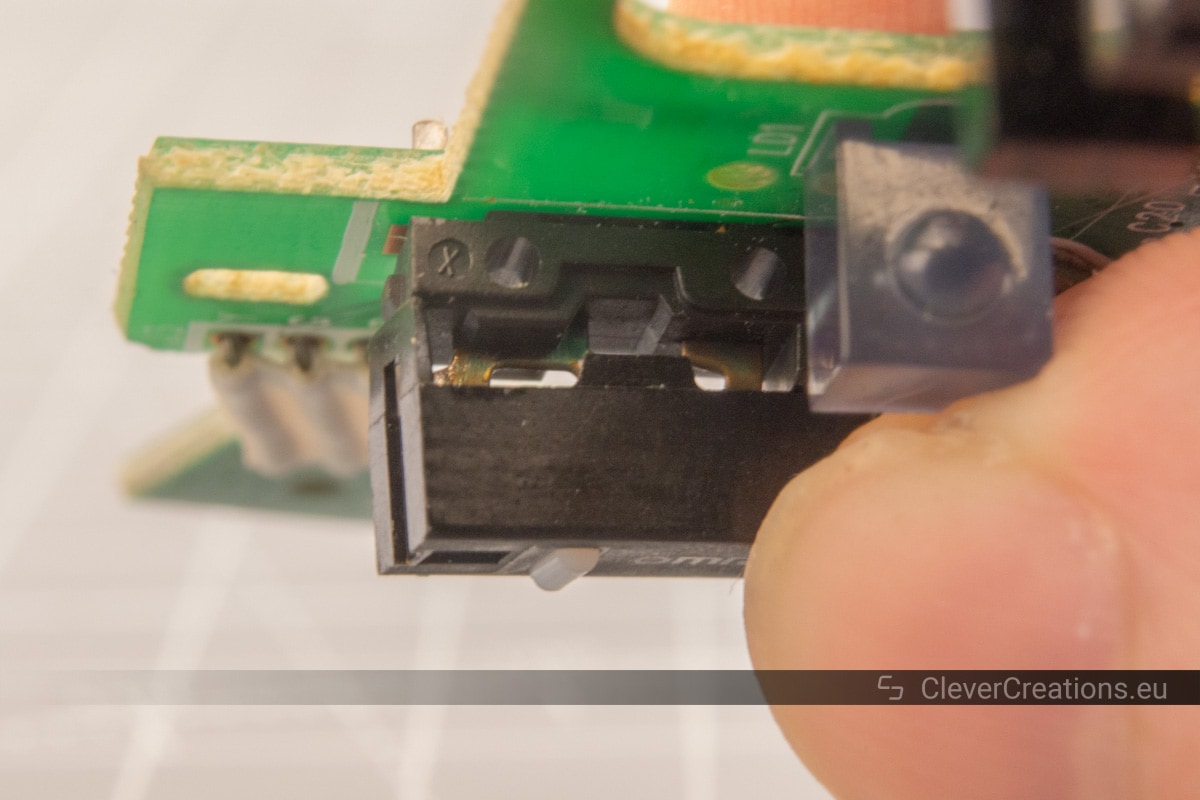
Opening the Microswitch

For the sake of this guide I will treat the copper spring as if it has lost its springiness, which is the more common cause of double-clicking issues.
Restoring the Springiness of the Spring
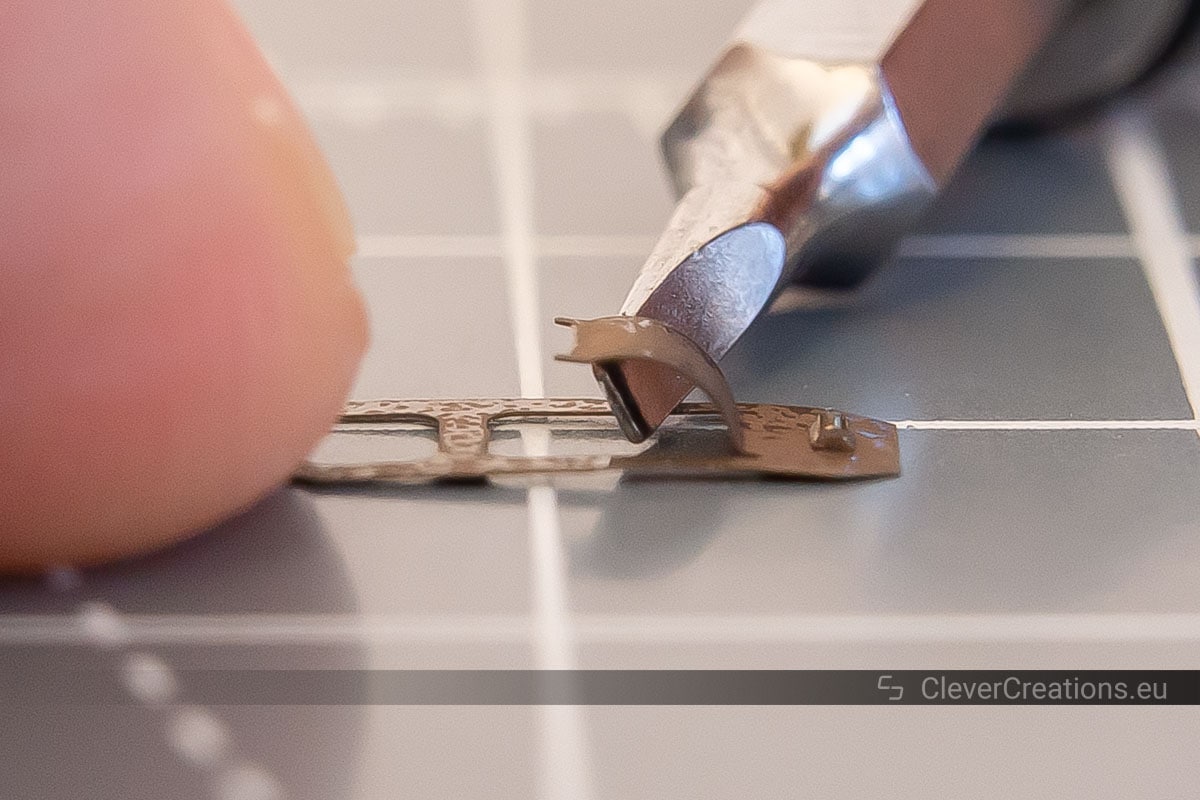
To reinsert the spring:
- Hook the front of the spring to the mounting point in the front of the mechanism (left side of the microswitch in the picture above).
- Place the other end of the copper spring under the hook of the mechanism (on the opposite side of the switch)
- Push the curved tab into place with a flathead screwdriver (in the middle of the switch).
After this, reassemble the mouse by doing the disassembly steps in reverse.
Because of the difficulty precisely bending the spring, reinserting it, and still not being guaranteed a working result, I usually just put in a completely new microswitch and be done with it.
A Summary of the Microswitch Repair Process
- If you are using a wireless mouse, remove the batteries.
- Remove the mouse feet from the underside of the mouse.
- Unscrew any screws that hold the mouse together.
- Take the two halves of outer mouse shell apart.
- If necessary, remove the circuit board screws and take out the circuit board.
- Open the microswitch.
- Take the copper spring out of the microswitch.
- Bend the copper spring tab.
- Put the spring back into the microswitch.
- Put the cover of the switch back on.
- Reassemble the mouse by executing the disassembly steps in reverse.
How to Replace a Mouse Microswitch
What You’ll Need


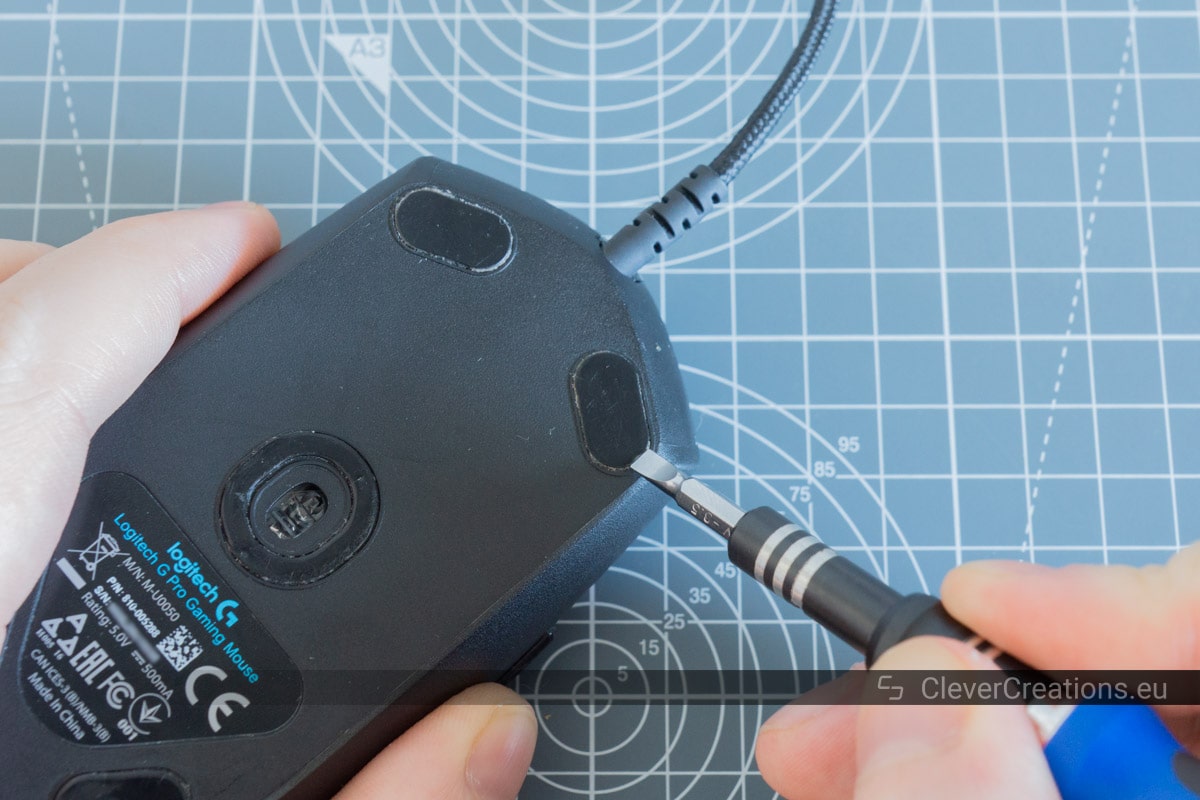
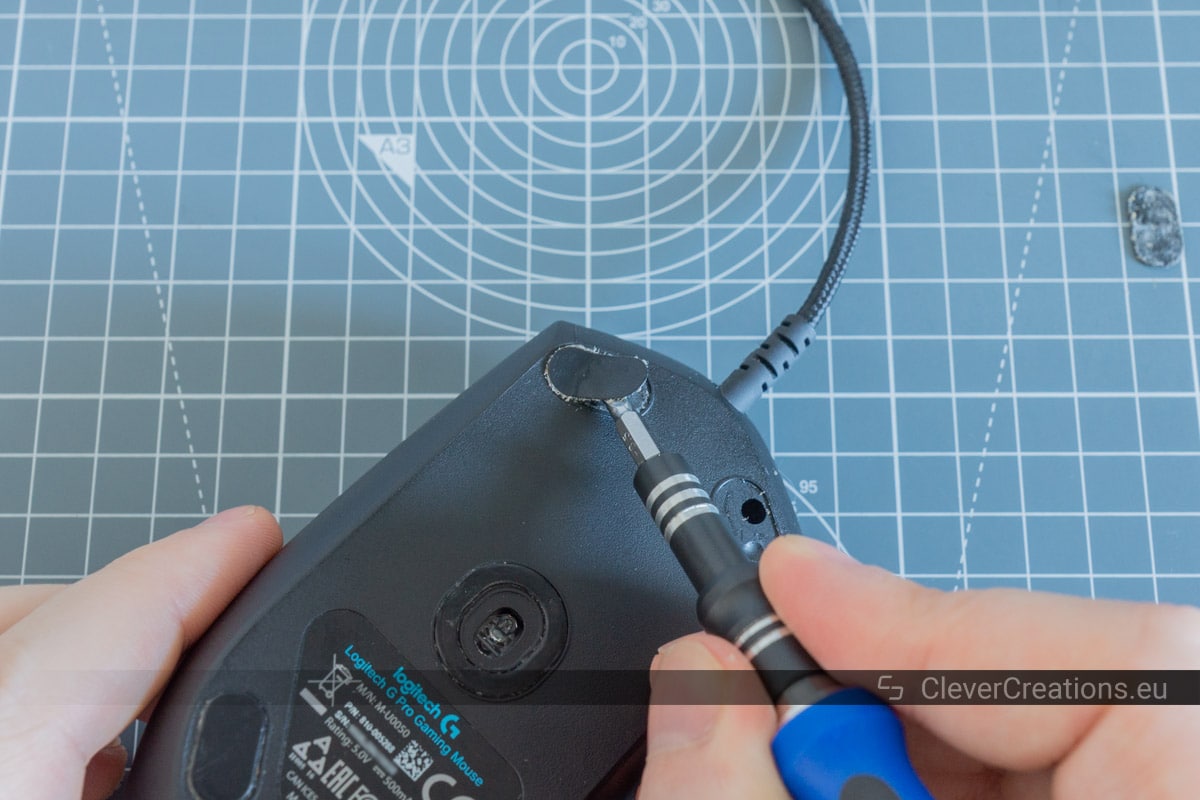
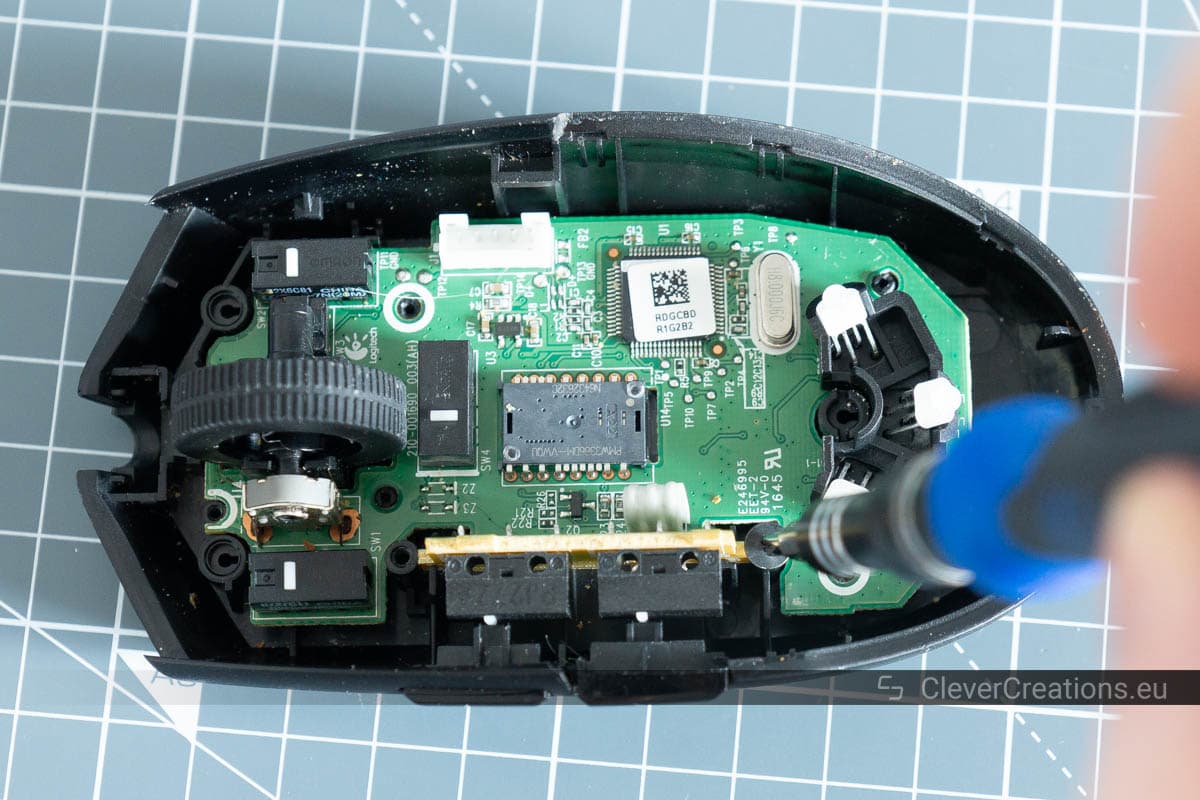
Opening the Mouse

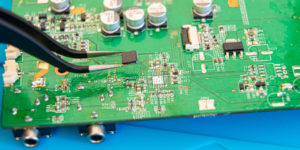
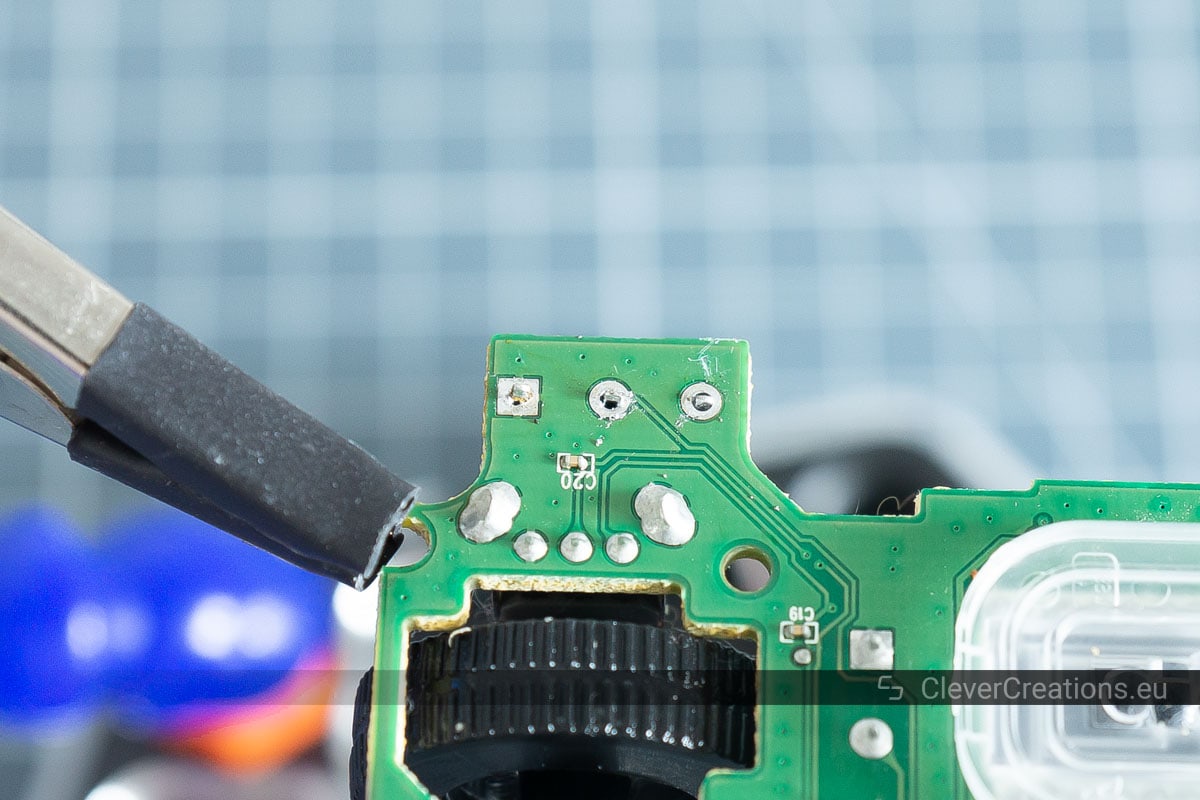
Removing the Faulty Microswitch


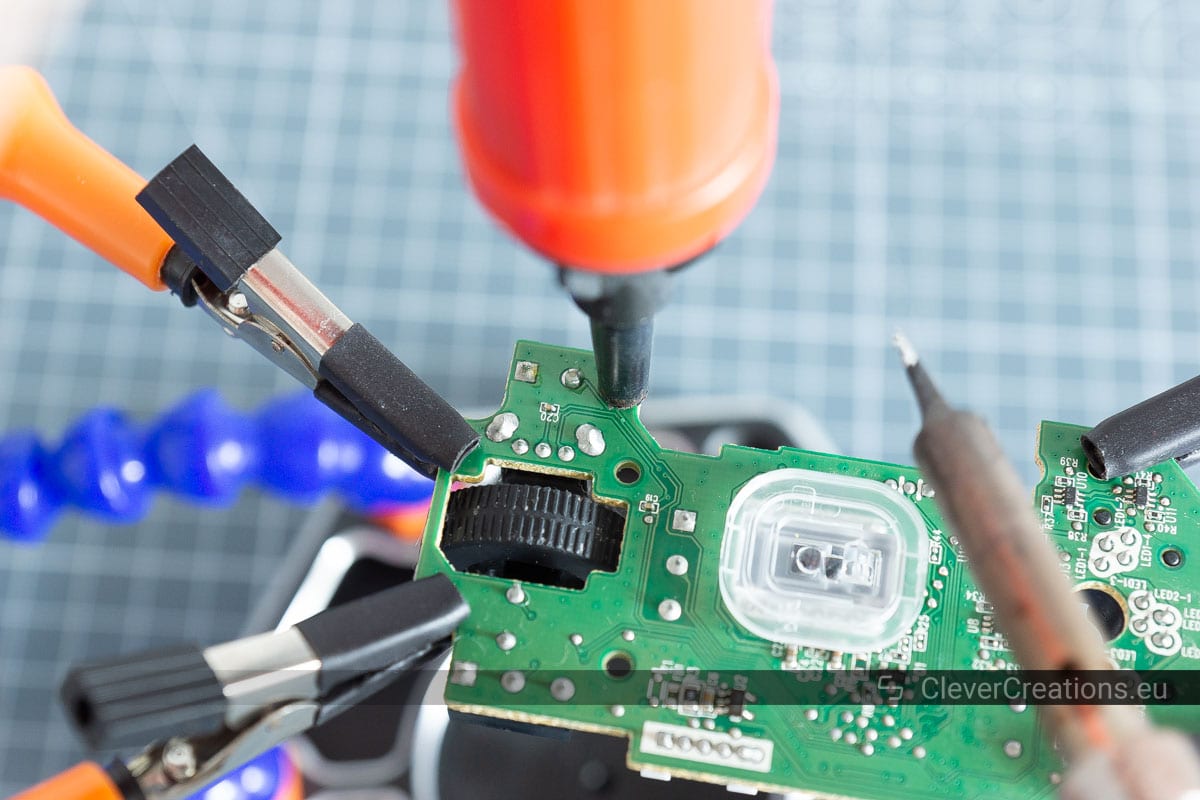

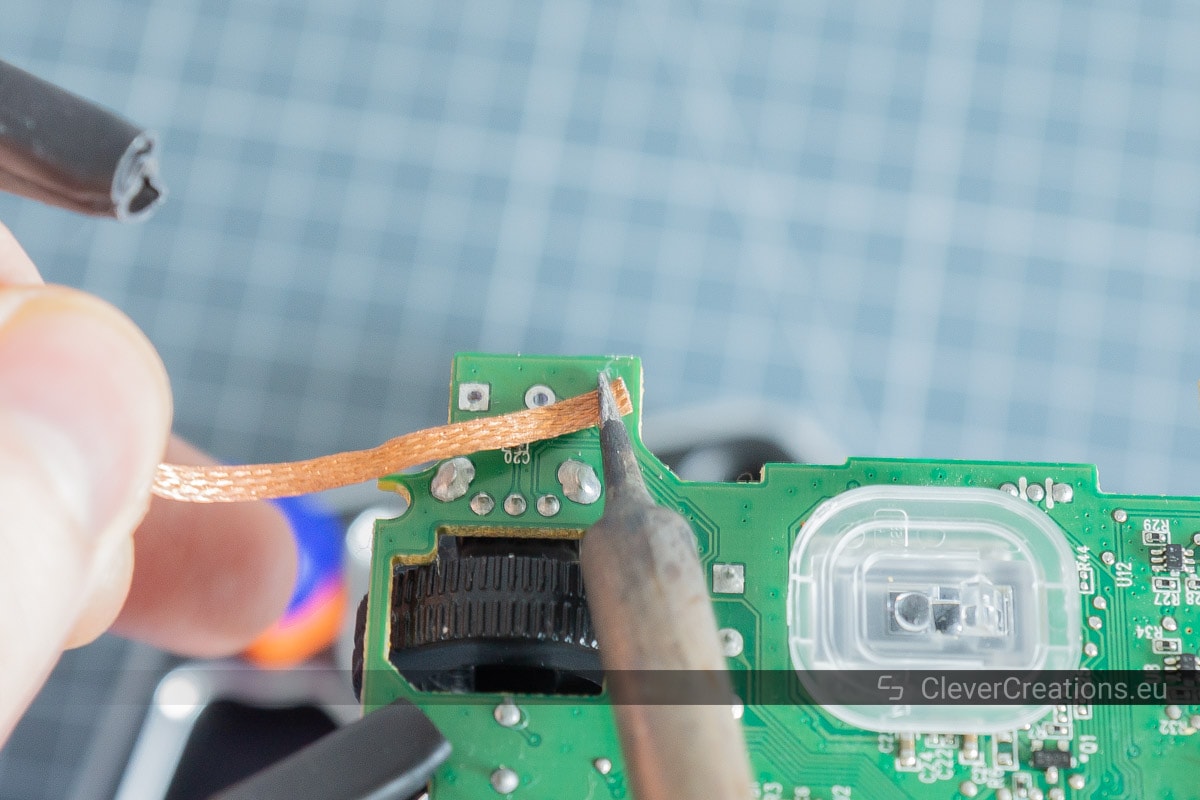
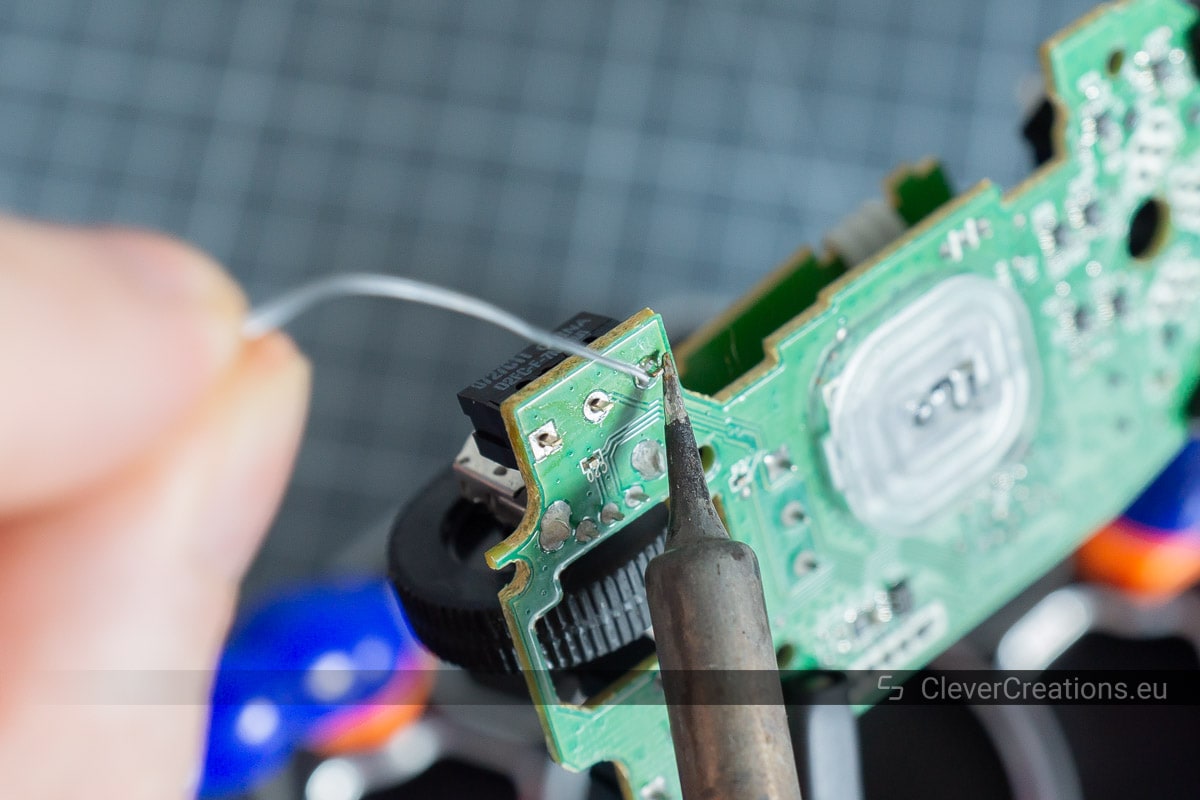
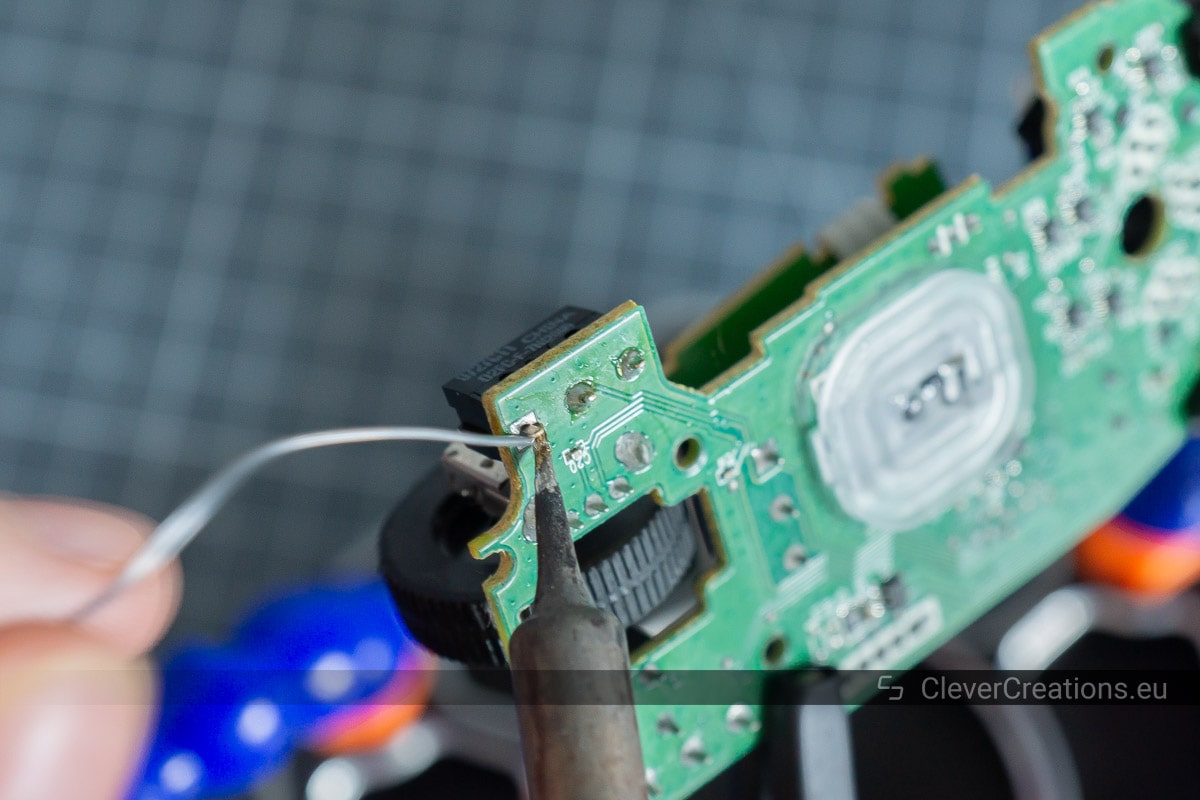
Soldering the New Microswitch to the Circuit Board

Reassembling the Mouse
A Summary of the Microswitch Replacement Process
- If you are using a wireless mouse, remove the batteries.
- Remove the mouse feet that will give you access to the screws.
- Unscrew the screws from the mouse body.
- Detach the two halves of the plastic casing.
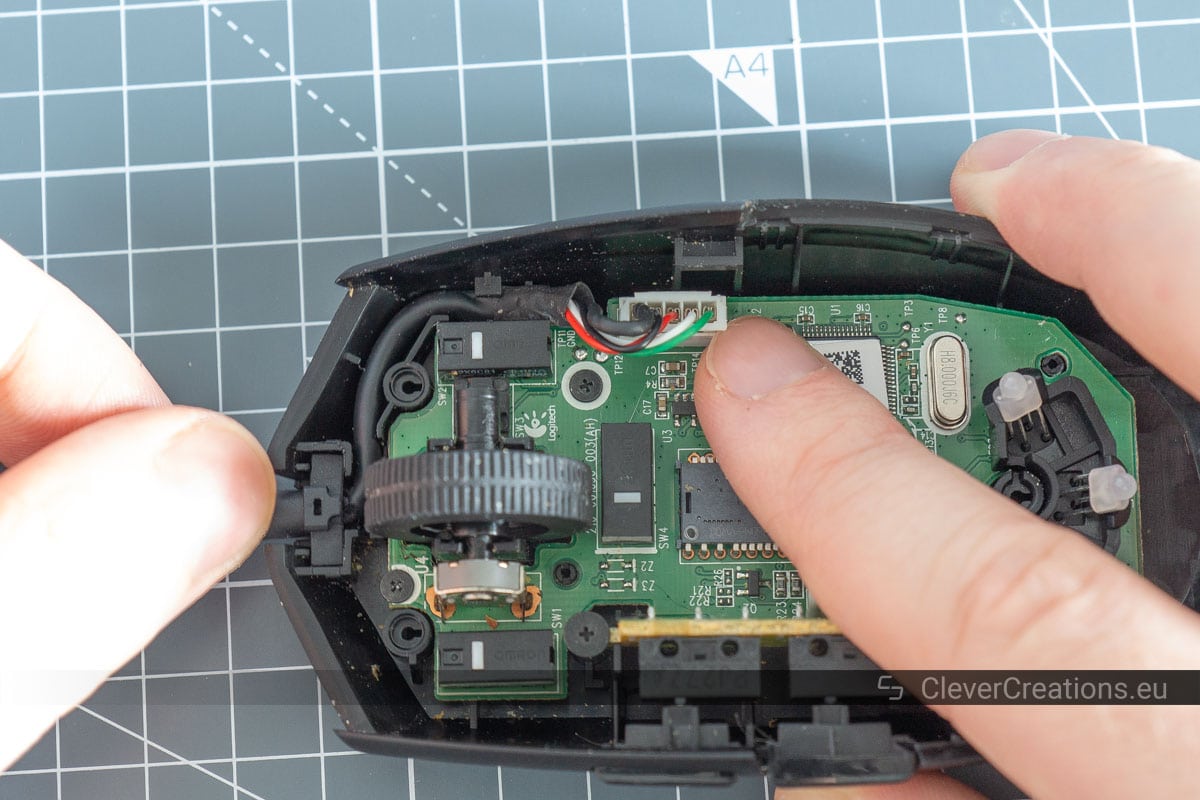
- If your mouse has a cable, unplug it from the circuit board.
- Unscrew all screws that keep the circuit board in place.
- Take the circuit board out of the plastic casing.
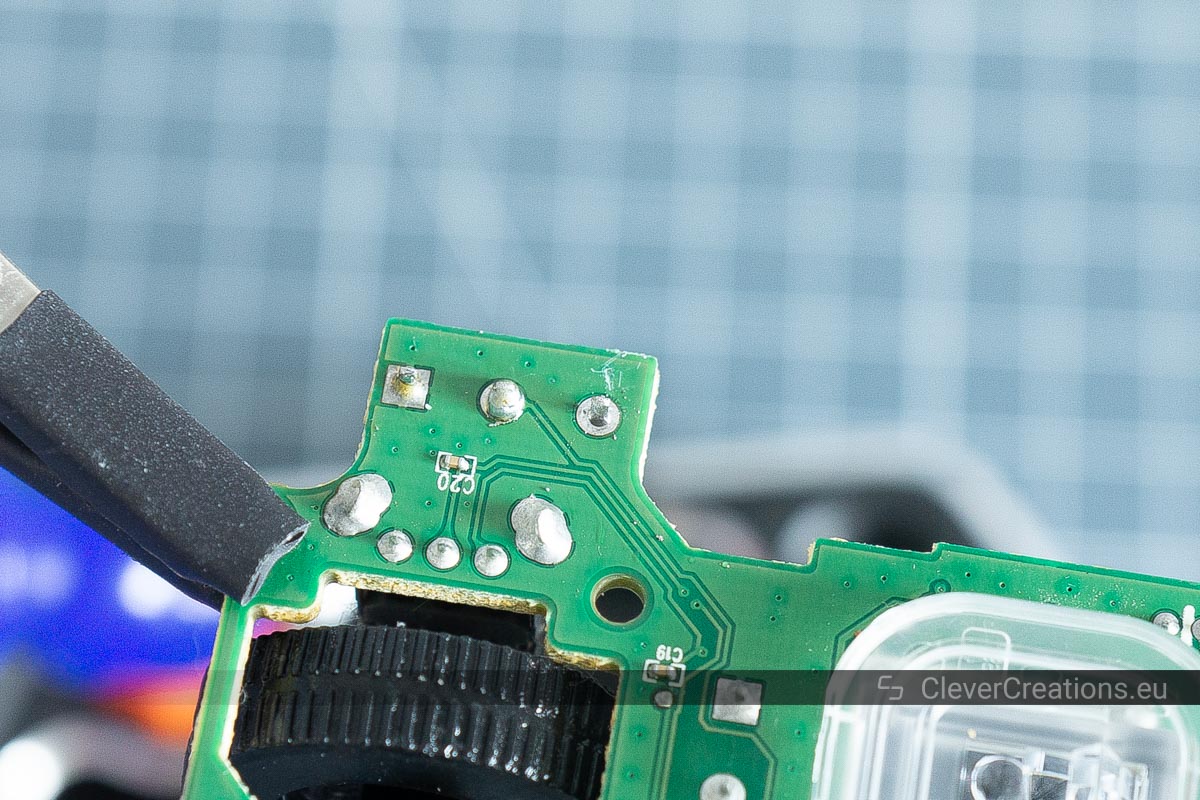
- Remove any solder from the pins of the faulty microswitch with a desoldering pump.
- Remove the microswitch.
- If necessary, clean the solder pads.
- Place a new microswitch into the holes on the circuit board.
- Solder the new microswitch onto the circuit board.
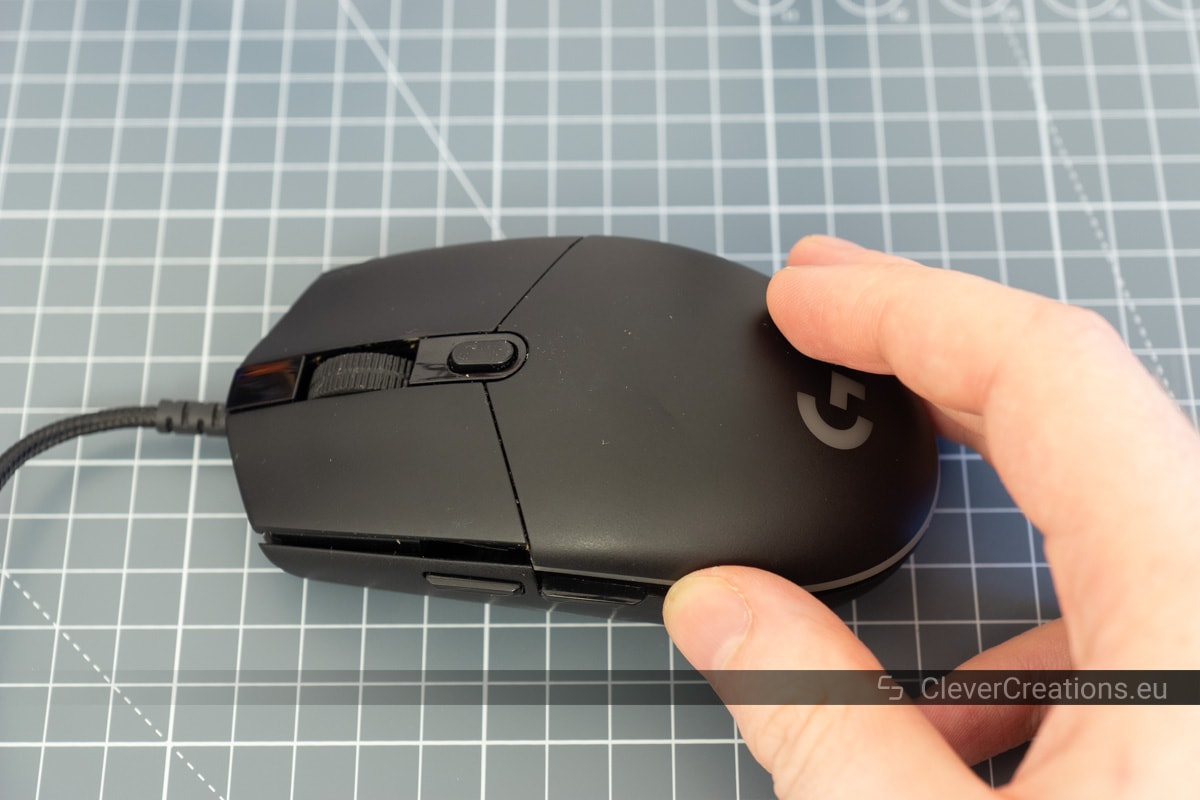
- Reassemble the mouse by performing the disassembly steps in reverse.
Conclusion
As you can see, it is not too difficult to fix a faulty microswitch on your mouse yourself. This means that there is no need to discard a mouse anymore simply because it is randomly double clicking.
It might be necessary to replace the switches every couple of years, depending on how often you use the mouse. As far as I can tell, there is not much that can be done about that. The lifespan of the switches is very limited, and because of that, this is the component that is mostly responsible for issues with aging mice.